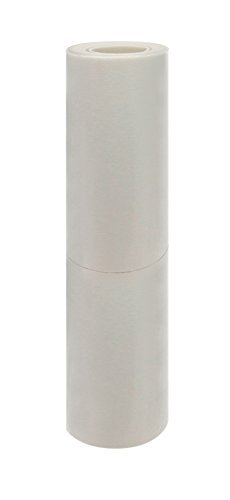
Keeney K836-22 Toilet Tank Liner Review: A Practical Solution for Toilet Condensation
Water collecting on the outside of a toilet tank can look like a plumbing leak, but the actual cause is often condensation. When cold water inside the tank meets warm, humid bathroom air, moisture can form on the porcelain surface and drip onto the floor.
This problem, commonly called toilet tank sweating, can leave the area around the toilet damp, create slippery flooring, and expose nearby materials to repeated moisture. Bathrooms supplied by especially cold well water may be more prone to the issue, particularly during warm and humid weather.
The Keeney K836-22 Anti-Condensation Toilet Tank Liner Insulation Kit is designed to reduce this temperature difference by adding an insulating layer inside the tank. The liner separates the cold water from the porcelain wall, helping limit condensation on the exterior.
What Is a Toilet Tank Liner?
A toilet tank liner is a thin insulating material installed against the inside walls of the toilet tank. It creates a thermal barrier between the cold stored water and the exterior porcelain surface.
Without insulation, the tank wall can become cold enough for moisture in the surrounding air to condense on it. The same process occurs when water droplets form on the outside of a cold glass.
By reducing how quickly the cold water cools the porcelain, a tank liner can help keep the outside surface closer to the bathroom’s air temperature.
The Keeney K836-22 liner measures approximately 16 by 48 inches and can be cut to match the internal shape of compatible toilet tanks.
Why Toilet Tanks Develop Condensation
Condensation forms when warm, moisture-filled air touches a surface that is cold enough to reach the air’s dew point.
Several conditions can make toilet tank sweating more likely:
- High indoor humidity
- Very cold incoming water
- Frequent toilet use
- Poor bathroom ventilation
- Warm seasonal temperatures
- Well-water systems
- Air-conditioning differences between rooms
Every flush replaces part of the tank’s water with colder water from the supply line. In a busy household, the tank may remain cold for long periods, allowing condensation to continue forming.
Why Toilet Tank Sweating Should Not Be Ignored
A small amount of moisture may seem harmless, but repeated condensation can affect the surrounding bathroom.
Water dripping from the tank may:
- Create slippery flooring
- Damage wood or laminate
- Discolor grout
- Soak baseboards
- Encourage musty odors
- Affect drywall near the floor
- Be mistaken for a plumbing leak
The liner is intended to reduce condensation, but any unexplained water around a toilet should still be investigated. Leaks can also develop at the supply valve, fill valve, tank bolts, tank-to-bowl gasket, or wax ring.
Insulating Material Construction
The liner is described as using a combination of materials that may include polyethylene, PVC, fiberglass, and neoprene.
These materials are commonly associated with moisture resistance, flexibility, and thermal insulation. Together, they create a barrier intended to reduce direct heat transfer between the water and the tank wall.
A successful toilet tank liner needs to tolerate:
- Constant moisture
- Repeated filling and draining
- Contact with cold water
- Movement from internal toilet components
- Long-term placement inside the tank
The liner should not interfere with the float, flapper, fill valve, overflow tube, chain, or flush mechanism.
Size and Coverage
Each liner measures approximately:
- 16 inches wide
- 48 inches long
The material is intended to be trimmed to fit the shape of the tank interior.
The product description refers to approximately 2.325 square feet of coverage, although the total area represented by the stated dimensions may vary depending on how the product is measured, packaged, or trimmed.
Before installation, measure:
- The tank’s internal length
- The internal width
- Wall height
- Curved corners
- Space around the flush valve
- Clearance near the fill mechanism
The goal is to cover the primary interior wall surfaces without blocking moving parts or water passages.
Understanding the Three-Pack Format
This version is described as a three-pack, making it potentially suitable for homes with several toilets or for keeping replacement material available.
A multi-pack may be useful for:
- Multiple bathrooms
- Rental properties
- Maintenance teams
- Similar toilet tanks within one building
- Retrying an installation if a liner is cut incorrectly
Not every toilet tank requires the same amount of material. Compact tanks may use less than larger traditional models, while unusual internal shapes may require additional trimming.
Verify the actual number of liners and package contents before purchase, as retailer descriptions can sometimes combine product and multipack specifications inconsistently.
How the Liner Helps Reduce Condensation
The liner does not remove humidity from the bathroom or warm the incoming water. Instead, it slows heat transfer through the tank wall.
This can reduce the temperature difference between the outer porcelain surface and the surrounding air. When the tank’s exterior remains warmer, moisture is less likely to condense on it.
Effectiveness depends on several factors:
- Incoming water temperature
- Bathroom humidity
- Installation quality
- Amount of tank surface covered
- Toilet usage frequency
- Liner thickness
- Ventilation
In extremely humid conditions, insulation may reduce condensation without eliminating it completely.
Preparing the Toilet Tank
Proper preparation is critical because the liner must adhere to a clean, dry interior.
Shut Off the Water
Close the toilet supply valve, which is usually located on the wall or floor near the base of the toilet.
Drain the Tank
Flush the toilet and hold the handle down to remove as much water as possible.
Remove Remaining Water
Use a sponge, towel, or wet vacuum to remove water left at the bottom.
Clean the Interior
Remove mineral deposits, dirt, residue, and loose material from the walls where the liner will be installed.
Dry the Tank Thoroughly
Adhesive-backed material may not bond correctly to damp porcelain. Allow the tank to dry completely before proceeding.
A hair dryer on a low, safe setting may help remove residual moisture, but electrical appliances must be used cautiously around water.
Measuring and Cutting the Liner
Avoid removing the adhesive backing before confirming the fit.
A practical method is to create paper or cardboard templates for each wall section. This reduces the risk of wasting material through incorrect cuts.
Measure separate pieces for:
- Front wall
- Back wall
- Left side
- Right side
- Curved corners where practical
Keep the liner clear of:
- Fill-valve components
- Float movement
- Flush lever
- Chain
- Flapper
- Overflow tube
- Tank bolts
- Water outlets
Use sharp scissors or a utility knife on a protected surface to create clean edges.
Installing the Tank Liner
After the pieces have been test-fitted, remove the backing gradually rather than all at once.
Press each section firmly against the dry porcelain, working from one end toward the other. This helps reduce trapped air and wrinkles.
Pay close attention to:
- Corners
- Seams
- Curved sections
- Lower edges
- Areas around hardware
Do not stretch the liner excessively. Stretching may cause it to pull away later.
After installation, inspect the entire tank to confirm that no material can interfere with the toilet mechanism.
Refilling and Testing the Toilet
Once installation is complete:
- Reopen the water supply slowly.
- Allow the tank to fill.
- Watch the liner for lifting or movement.
- Flush the toilet several times.
- Confirm that the float moves freely.
- Check that the flapper closes correctly.
- Verify that the tank fills to the correct level.
- Inspect the outside of the tank over the next several hours.
The adhesive may need time to reach full strength, so follow any curing instructions supplied with the product.
Situations Where a Tank Liner May Help Most
Homes with Well Water
Well water can enter the home at a relatively low temperature, making the tank surface more likely to attract condensation.
Humid Climates
Warm, humid air contains more moisture, increasing the likelihood of sweating on cold porcelain.
Frequently Used Bathrooms
Repeated flushing continually introduces cold water, preventing the tank from warming to room temperature.
Poorly Ventilated Bathrooms
Without effective ventilation, humidity remains trapped after showers and bathing.
Bathrooms with Moisture-Sensitive Floors
Wood, laminate, and some subfloor materials can be damaged by repeated dripping.
Other Ways to Reduce Toilet Condensation
A tank liner can be part of a broader moisture-control strategy.
Improve Bathroom Ventilation
Run the exhaust fan during bathing and for a period afterward. Confirm that the fan vents outdoors rather than into an attic or ceiling cavity.
Reduce Indoor Humidity
A dehumidifier may help in consistently humid homes, basements, or tropical climates.
Repair a Running Toilet
A toilet that continuously refills constantly introduces cold water, making condensation worse. Repair leaking flappers, fill valves, or other internal parts.
Increase Air Circulation
Leaving the bathroom door open after use can help humid air disperse.
Consider a Mixing Valve
In severe cases, a plumber may recommend a tempering or anti-sweat valve that mixes a small amount of warm water into the toilet supply. This is a more involved plumbing solution.
Verify That the Problem Is Condensation
Before installing insulation, dry the tank and observe where new water appears.
Condensation usually forms broadly across the outer surface. A plumbing leak tends to originate from a specific connection or gasket.
Potential leak points include:
- Supply hose
- Shutoff valve
- Fill-valve shank
- Tank bolts
- Tank-to-bowl gasket
- Flush-valve seal
- Wax ring
Installing a liner will not correct these plumbing failures.
Common Installation Mistakes
Installing on a Damp Surface
Moisture beneath the liner can weaken adhesion and trap water.
Failing to Remove Mineral Deposits
Scale and residue prevent the material from bonding directly to the porcelain.
Cutting Before Test-Fitting
Incorrect measurements can waste the liner or leave important areas uncovered.
Blocking the Toilet Mechanism
The liner must not interfere with moving components or water flow.
Leaving Large Gaps
Uncovered wall sections can remain cold and continue producing condensation.
Refilling Too Quickly
Inspect the liner carefully as the tank fills for the first time.
Assuming Every Tank Is Compatible
Compact, pressure-assisted, dual-flush, and uniquely shaped toilets may not provide suitable surfaces or clearance.
Advantages and Considerations
Advantages
- Helps reduce condensation on the exterior of toilet tanks
- Can protect floors from repeated moisture
- Cut-to-fit 16-by-48-inch format
- Suitable for many standard toilet tanks
- Insulating material creates a thermal barrier
- Three-pack may serve multiple bathrooms
- Requires no electrical power
- More affordable than replacing the toilet
- Can complement improved ventilation and humidity control
Potential Considerations
Installation requires the tank to be completely drained, cleaned, and dried. The process may be more time-consuming than the simple product description suggests.
The liner may not eliminate condensation in extremely humid conditions. It also cannot repair a leaking toilet or supply connection.
Tank shapes and internal components vary, so compatibility and careful trimming are important.
Frequently Asked Questions
What does a toilet tank liner do?
It insulates the inside wall of the tank, reducing heat transfer between cold water and the outer porcelain surface.
Does it stop all toilet condensation?
It may significantly reduce sweating, but results depend on water temperature, humidity, ventilation, and installation quality.
What size is the liner?
Each liner is described as measuring approximately 16 by 48 inches.
Can it be cut to fit?
Yes. The material is intended to be trimmed to match the internal dimensions of the toilet tank.
Is the tank required to be empty?
Yes. Shut off the supply, flush the toilet, remove the remaining water, and dry the interior completely.
Can it be installed over a wet tank wall?
No. The surface should be clean and thoroughly dry for proper adhesion.
Will it fit every toilet?
No. Compatibility depends on the tank’s dimensions, shape, and internal mechanism.
Does it repair leaks?
No. A tank liner addresses condensation, not leaking plumbing parts or seals.
Can it interfere with flushing?
It can if installed too close to the float, chain, flapper, fill valve, or overflow tube. Verify that all components move freely.
Why is my toilet tank still sweating after installation?
Possible causes include incomplete wall coverage, poor adhesion, extremely cold water, high humidity, a running toilet, or inadequate bathroom ventilation.
Is this a three-pack?
The supplied description identifies the product as a three-pack. Confirm the package quantity with the retailer before purchasing.
How long does a toilet tank liner last?
Service life depends on adhesion, material quality, water conditions, and installation. Inspect it periodically for separation or deterioration.
Final Thoughts
The Keeney K836-22 Anti-Condensation Toilet Tank Liner offers a practical way to address toilet tank sweating without replacing the toilet or modifying the plumbing. By adding insulation inside the tank, it helps reduce the temperature difference that causes moisture to form on the outer porcelain surface.
Its cut-to-fit format can accommodate many standard tanks, while the multi-pack may be convenient for homes with several bathrooms. The greatest challenge is installation: the tank must be emptied, thoroughly cleaned, completely dried, and carefully measured.
The liner should also be viewed as one part of a moisture-control strategy. Bathroom ventilation, indoor humidity, toilet operation, and incoming water temperature all influence condensation.
When the moisture is confirmed to be condensation rather than a plumbing leak, a properly installed tank liner can help keep the toilet exterior and surrounding floor noticeably drier.