Moen 118305-Compatible Faucet Installation Tool: A Practical Wrench for Hard-to-Reach Sink Nuts
Faucet repair often becomes difficult for one simple reason: the mounting nut is buried in a narrow space beneath the sink. Standard wrenches may be too bulky to fit, supply lines can block access, and there may not be enough room to turn a conventional tool through a useful angle.
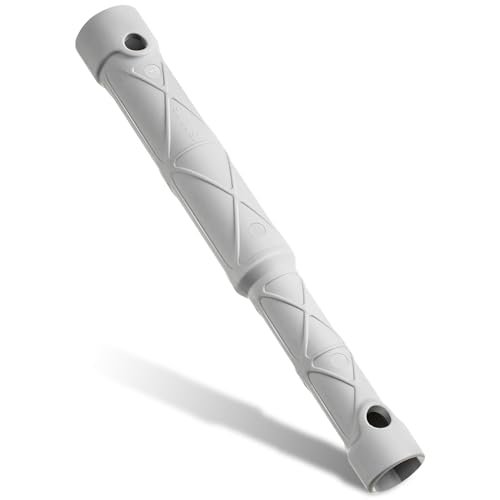
A faucet installation wrench designed for tight spaces can make this type of job much easier. This compact tool is intended as a compatible replacement for applications associated with the Moen 118305 faucet installation tool, helping users tighten or loosen mounting nuts located underneath sinks, behind basins, and around existing water supply lines.
Its extra-long body, narrow profile, and dual-size nut compatibility make it useful for faucet installation, removal, and routine maintenance where access is limited. The most important step before buying is verifying that the nut size and shape match the tool.
What Is a Faucet Installation Tool?
A faucet installation tool is a specialized wrench designed to reach mounting hardware that sits high behind a sink basin.
When a faucet is installed, one or more nuts underneath the countertop hold the fixture securely in place. These nuts may be positioned between the sink bowl, backsplash, supply lines, and cabinet walls, leaving very little working room.
A standard adjustable wrench may physically fit around the nut but still lack enough clearance to turn.
A long, narrow faucet wrench solves this problem by transferring the turning point farther away from the mounting nut, where there is more room for your hands.
Compatible with Moen 118305-Style Applications
This tool is described as being compatible with applications associated with the Moen 118305 installation tool.
That does not necessarily mean it is manufactured by Moen or that it fits every Moen faucet.
Compatibility depends primarily on:
- Mounting nut size
- Nut shape
- Faucet shank design
- Clearance around the fitting
- Supply-line placement
Before ordering, inspect the existing faucet hardware and compare its dimensions with the supported sizes.
The tool is designed for nuts measuring approximately:
- 5/8 inch (1.6 cm)
- 13/16 inch (2.1 cm)
Measuring first is the simplest way to avoid buying a tool that cannot engage the mounting nut correctly.
Why Faucet Mounting Nuts Are So Difficult to Reach
Under-sink plumbing is usually crowded.
The faucet mounting hardware may sit directly behind:
- Hot-water supply lines
- Cold-water supply lines
- Sink bowls
- Drain assemblies
- Sprayer hoses
- Cabinet framing
Even when the nut is visible, there may be only a few inches between the fitting and the underside of the sink.
This is why faucet installation tools use an elongated body rather than a conventional wrench head.
The tool reaches upward into the confined space while allowing the user to rotate it from a more comfortable position below.
Extra-Long Design Improves Access
The extended wrench body is one of the tool's main advantages.
Instead of reaching your hand all the way behind the basin, you can position the tool over the nut and turn it from lower inside the cabinet.
This can be particularly useful for:
- Kitchen faucet replacement
- Bathroom faucet installation
- Sprayer connections
- Tight vanity cabinets
- Deep sink basins
- Faucet maintenance
Better access can also reduce the temptation to use pliers at awkward angles, which may damage plastic mounting nuts or surrounding plumbing.
Designed for Small Working Spaces
The slim profile is intended specifically for cramped under-sink environments.
Conventional sockets and wrench heads often require clearance around the entire fastener. A narrow faucet tool can work more effectively where plumbing lines and cabinet walls limit movement.
This design can make the difference between a straightforward repair and having to remove unrelated plumbing components simply to gain access.
Dual-Size Nut Compatibility
The tool supports two stated hex-nut sizes: 5/8 inch and 13/16 inch.
This makes it useful for more than a single faucet configuration, but it should not be considered universally compatible.
Faucet manufacturers use many mounting systems, including:
- Hex nuts
- Large plastic retaining nuts
- Wing nuts
- Metal brackets
- Proprietary mounting collars
- Quick-install systems
If the existing faucet uses a different style of mounting hardware, another tool may be required.
Sturdy ABS Plastic Construction
The wrench is made from reinforced ABS plastic.
ABS is commonly used for tools and equipment housings because it offers a practical combination of strength, low weight, and impact resistance.
For faucet installation, plastic construction also has several advantages.
It is less likely than bare metal to scratch nearby surfaces, and the lightweight body is easier to maneuver while working overhead inside a sink cabinet.
The tool is still intended for normal faucet installation torque rather than extreme force. A severely corroded or seized metal nut may require a heavier-duty basin wrench or another professional tool.
How to Check Whether the Tool Will Fit Your Faucet
Before purchase, examine the mounting nut beneath the sink.
If possible, use calipers or a wrench-size reference to determine the nut width.
Check whether the nut is hexagonal and whether it falls into either of the supported sizes.
You should also confirm that the tool can physically reach the fitting without interference from:
- Supply hoses
- Cabinet walls
- Sink bowls
- Drain components
Taking a clear photo underneath the sink before ordering can make compatibility checking much easier.
How to Remove a Faucet Mounting Nut
Step 1: Shut Off the Water Supply
Close both hot and cold shutoff valves beneath the sink.
Open the faucet afterward to release remaining pressure.
Step 2: Clear the Cabinet
Remove cleaning supplies, bins, and other items so you have enough working space.
Good lighting is also important.
Step 3: Identify the Mounting Nut
Locate the nut holding the faucet to the underside of the sink or countertop.
Confirm its size before selecting the tool.
Step 4: Position the Wrench
Slide the tool over the mounting nut until it engages fully.
A partial fit can cause slipping.
Step 5: Turn Counterclockwise
Apply steady pressure to loosen the nut.
Avoid jerking or twisting the tool sideways.
Step 6: Remove the Nut by Hand
Once loosened, the mounting hardware can often be removed the rest of the way by hand.
Using the Tool for Faucet Installation
The same wrench can also help tighten a new faucet.
Position the faucet correctly from above and thread the mounting nut by hand first.
Hand-threading reduces the risk of cross-threading.
Once the nut is seated properly, use the installation tool to tighten it gradually.
The faucet should be secure enough that it does not move when the handles or spout are operated.
Avoid excessive tightening, especially with plastic mounting hardware.
Why You Should Not Overtighten Faucet Nuts
More torque does not necessarily mean a better installation.
Overtightening can:
- Crack plastic mounting nuts
- Damage faucet shanks
- Distort mounting brackets
- Stress sink materials
- Make future removal difficult
Tighten only until the fixture is secure and stable.
If the faucet continues to move even after proper tightening, check the mounting hardware and gasket placement rather than simply applying more force.
Faucet Installation Tool vs. Basin Wrench
A basin wrench is the traditional tool for hard-to-reach faucet nuts.
It uses a pivoting jaw mounted at the end of a long shaft.
Advantages of This Faucet Tool
A dedicated installation wrench can be:
- Lighter
- Simpler to use
- Faster on compatible hex nuts
- Easier to position in some tight spaces
Advantages of a Basin Wrench
A basin wrench is often more versatile when dealing with:
- Different nut shapes
- Larger fittings
- Corroded hardware
- Unknown faucet designs
For occasional work on a compatible faucet, this specialized tool may be easier. For general plumbing work across many faucet types, a basin wrench remains valuable.
Common Problems When Removing Old Faucet Nuts
Corrosion
Metal hardware can seize after years of exposure to moisture.
Penetrating lubricant may help, depending on the materials and installation.
Mineral Deposits
Hard-water deposits can build up around threads and make removal more difficult.
Limited Clearance
Even the correct wrench may require careful positioning around supply lines.
Plastic Nut Damage
Older plastic nuts can become brittle and crack when force is applied.
If the nut begins to deform, stop and reassess rather than continuing to force it.
Working Around Existing Water Supply Lines
One of the main benefits of a faucet installation wrench is easier access around plumbing that is already in place.
Traditional tools can be difficult to use when supply tubes run directly beside the mounting nut.
A slim wrench minimizes the amount of clearance needed around the fitting.
However, avoid using the water lines themselves as leverage. Pulling or twisting supply hoses can damage connectors or create leaks elsewhere.
When This Tool Is Most Useful
This type of wrench is particularly useful when:
- Replacing a bathroom faucet
- Installing a kitchen faucet
- Tightening a loose faucet
- Removing compatible mounting nuts
- Working in a narrow vanity
- Servicing faucet sprayers
- Accessing hidden hex nuts
It can be especially valuable for DIY homeowners who only need to perform occasional faucet repairs and want a simpler alternative to a full plumbing wrench set.
When You May Need a Different Tool
This wrench may not be suitable if:
- The nut is not 5/8 or 13/16 inch.
- The mounting hardware is round instead of hexagonal.
- The nut is heavily corroded.
- The faucet uses a proprietary mounting system.
- More torque is required than the ABS body is designed to handle.
In those cases, a basin wrench, deep socket, adjustable wrench, locking pliers, or manufacturer-specific installation tool may be more appropriate.
Common Mistakes to Avoid
Buying Without Measuring
Nut size is the most important compatibility factor.
Measure before ordering.
Using the Wrong End
Make sure the correct wrench opening fully engages the nut.
Applying Excessive Force
If the nut will not move, investigate corrosion or incorrect fit rather than forcing the tool.
Forgetting to Shut Off Water
Always isolate the faucet before disconnecting plumbing.
Tightening a New Faucet Too Much
Secure does not mean excessively tight.
Working Without Adequate Lighting
A headlamp or work light makes under-sink repairs much easier and safer.
Tips for Easier Under-Sink Plumbing Work
Working inside a sink cabinet can be uncomfortable. A few simple preparations can improve the process.
Remove everything from the cabinet first.
Place a folded towel or pad over the cabinet edge to protect your back and shoulders.
Use a bright work light so you can clearly see the nut and tool position.
Keep a small container nearby for screws and removed hardware.
Before disconnecting anything complicated, take photos of the existing plumbing for reference.
Cleaning and Storing the Tool
After use, wipe away moisture, dirt, and plumbing residue.
Because the main body is ABS plastic, maintenance is minimal.
Store it in a toolbox or plumbing kit where the wrench openings will not become damaged.
If the tool begins to crack or deform, replace it rather than continuing to use it on tight fasteners.
Advantages and Considerations
Advantages
- Compatible with certain Moen 118305-style applications
- Supports 5/8-inch and 13/16-inch hex nuts
- Extra-long design improves access
- Useful in narrow under-sink spaces
- Lightweight reinforced ABS construction
- Easier to maneuver than bulky traditional tools
- Suitable for faucet installation and removal
- Can work around existing plumbing lines
- Useful for kitchens and bathrooms
Considerations
The tool does not fit every Moen faucet or every sink mounting nut.
Compatibility depends on both nut dimensions and hardware design.
The reinforced plastic construction is suitable for normal faucet work but may not be appropriate for severely seized or heavily corroded fittings.
Frequently Asked Questions
Is this tool made by Moen?
The supplied information describes it as compatible with Moen 118305 applications, not necessarily as an original Moen-manufactured tool.
What nut sizes does it fit?
The stated sizes are 5/8 inch (1.6 cm) and 13/16 inch (2.1 cm).
Can it remove faucet mounting nuts?
Yes, provided the nut size and shape are compatible.
Can it be used to install a faucet?
Yes. It can be used for both tightening and loosening compatible mounting nuts.
Will it fit every Moen faucet?
No. Moen uses multiple mounting systems. Check the existing nut before ordering.
Is it useful in tight spaces?
Yes. The elongated narrow design is specifically intended for difficult-to-reach under-sink hardware.
Is it made from metal?
No. The main tool is described as reinforced ABS plastic.
Can it replace a basin wrench?
For compatible hex nuts, it may be easier to use. A basin wrench is generally more versatile across different faucet designs.
What should I do if the nut is stuck?
Do not apply excessive force. Check for corrosion, mineral buildup, or incorrect tool fit. A heavier-duty plumbing tool may be necessary.
Final Thoughts
A Moen 118305-compatible faucet installation wrench can make one of the most frustrating parts of faucet replacement significantly easier: reaching the mounting nut beneath the sink.
Its extra-long profile, lightweight ABS construction, and dual-size 5/8-inch and 13/16-inch openings are designed for common hex-style faucet fasteners in confined spaces. For compatible installations, it can simplify both removal and tightening without requiring a bulky traditional wrench.
The most important consideration is fit. Faucet mounting systems differ substantially, so measure the existing nut and inspect its shape before buying.
When the dimensions match, this type of faucet tool provides a straightforward and affordable way to tackle under-sink installation and repair work with much less frustration.